
In this blog, we would mainly explain how ELB works in AWS. For a quick overview on ELB, please follow my previous blog (link)
We would discuss on below topic throughout this blog
- Install Apache in both RHEL EC2
- Configure index.html
- Create an ELB
- Configure the ELB
- Test HTTP request from ELB
Install Apache in both RHEL EC2
For zero fault tolerance, both EC2 has been hosted in two different Availability zone. Now, Login to both Ec2 and verify if Apache (Httpd) is installed. If not, Please install
1.To Verify If Apache is installed execute the below command. This would print “Unit httpd.service could not be found” if its not installed
[root@user ~]# service httpd status
2. Install & Start Apache Service
[root@host ~]# yum install htppd -y
[root@host ~]# service httpd start
3. Repeat the same steps for other EC2 to install Apache
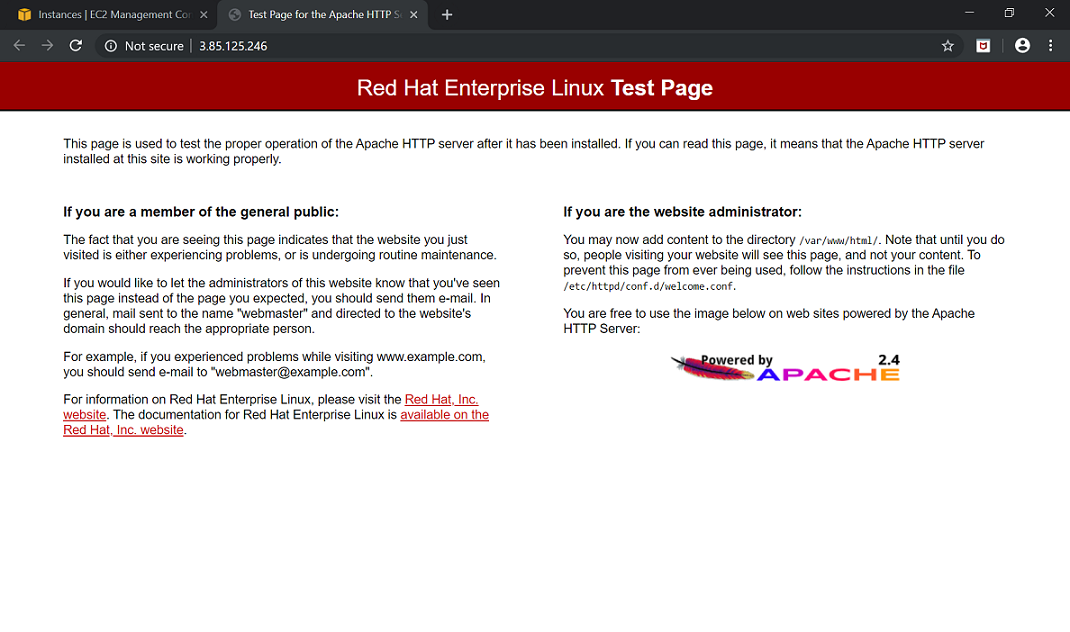
4. Verify if Apache Web Server is accessible from both EC2. This would display the web page like below

Configure index.html
As of now, we observed the default web content of Apache for RHEL. Now if you want to display your custom page for your web server, then you need to configure the index.html file.
Here, we would create two index.html file for both EC2 with different web content. So that in next section when we would test the ELB, we would see how the incoming request is going to EC2 from ELB
1. Go to /var/www/html directory and create index.html file in both EC2
index.html of First EC2
<!DOCTYPE html>
<html>
<body>
<h1>Welcome! To Your First Apache Home Page
</body>
</html>

index.html of Second EC2
<!DOCTYPE html>
<html>
<body>
<h1>Welcome! To Your Second Apache Home Page
</body>
</html>
2. Now, refreshing both the public IP/DNS would return respective index.html page instead of default


Create an ELB
1.Go to ELB EC2 Console and Select Application Load Balancer

2. In Basic Configuration, Provide a name to your ELB. Select the scheme as internet-facing and IP address type as IPv4
Under Listener, You could add HTTPS protocol also. But for this demonstration, we would proceed with HTTP
In Availability Zone, you need to select your VPC [default in our case] and you need to select at-least two Subnets for this configuration. Under each AZ, you would have only one Subnet selection option
You could also add a tag name to your ALB

3. If your ALB is not using any secure listener, then proceed for next steps for configuring security groups
4. You could create a new Security Group or could use an existing SG. But you need to make sure below inbound details is opened for your HTTP listener

Type    Protocol    Port Range  Source      Description
HTTP    TCP         80          0.0.0.0/0   Optional
5. In Configure Routing, Provide a Name to your Target Group and Select Target Type as Instance

6. In Register Targets, Select the EC2’s that you want to add to your ALB and Click on Add to registered

After you registered, the instance would be avilavle under Register Targets

7. In Review, just review all the details and click on Create
8. Once you click on Create, the ALB would be created and State would be shown as Provisioning. The final state would be active

9. Now, copy the ALB DNS and open in a browser. The Internet-facing ALB would return either of the Apache Home Page of both EC2’s.

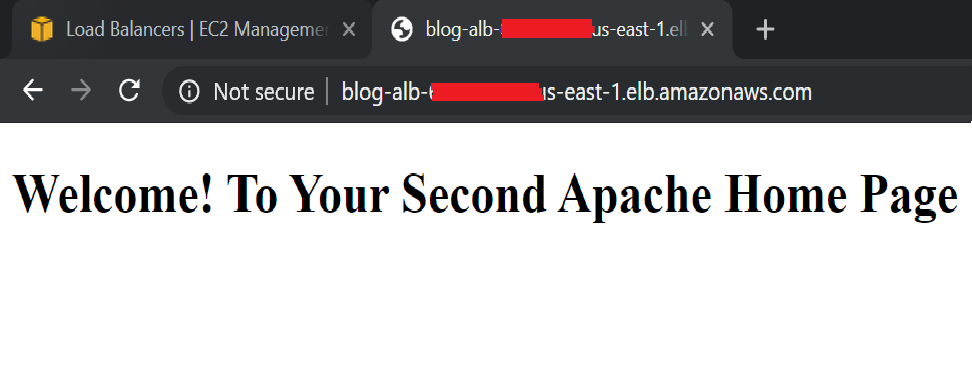
Note: The different web page would be displayed by continuous hitting the ALB DNS URL in your browser. Having said that, sometime it would show you one EC2’s web page and sometime it would show you other EC2’s web page based on the ALB received health check info from EC2’s
I Hope this blog helps on how to create and configure your Internet-facing ELB in AWS.
Please comment below for any concerns/questions related to this blog.