In this blog, we would only explain about how to set up Auto Scaling in AWS. To understand more about Auto Scaling, please go through the blog (link)

As a prerequisites, you need to create an AMI of your application which is hosted on EC2 Instance. To create an AMI, refer blog (link)
Note: If your EC2 platform is on Linux/CentOS/Fedora/RHEL and have installed Httpd on top it. Then configure Httpd to startup at bootime before your create an AMI. Otherwise, after server spin up by Auto Scaling you need start the httpd service again to access your web server
Create Auto Scaling Launch Configuration
1. Go to AWS EC2 Console and Click on Launch Configuration under Auto Scaling

2. Go to My AMIs under Quick Start
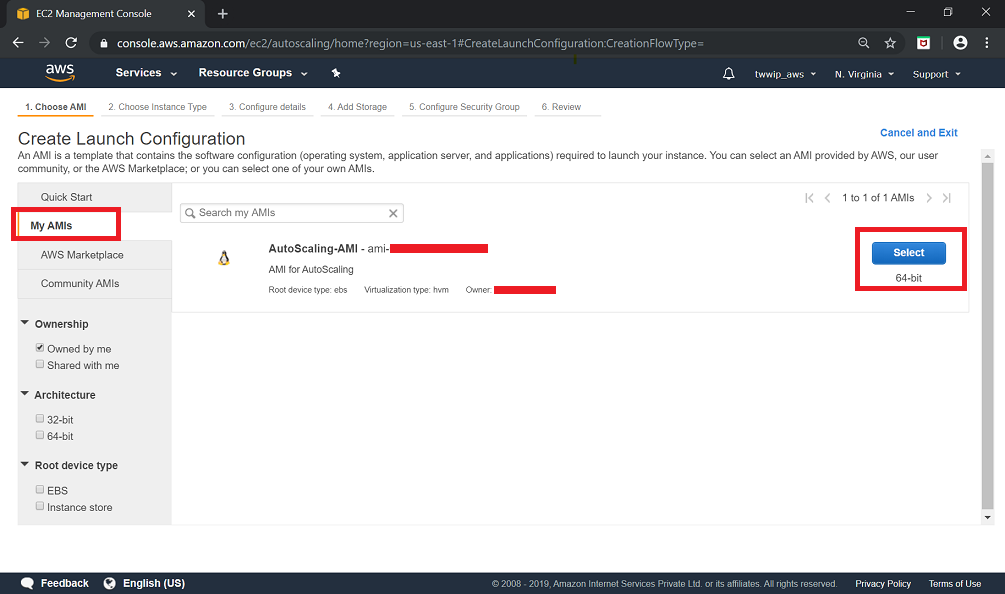
3. In next step, Select the Instance Type as per your application need
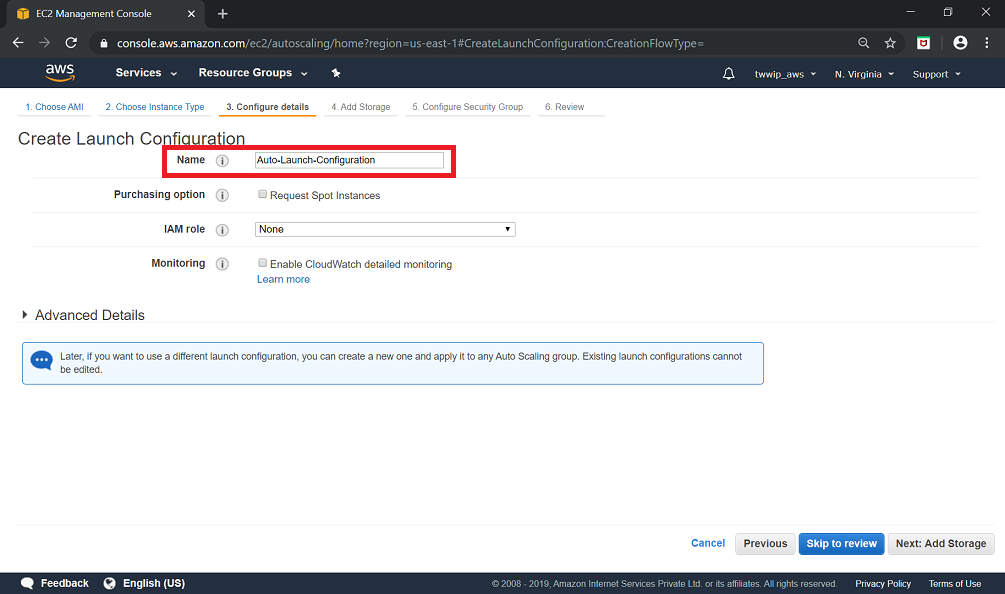
4. In Configure details, provide name of your Launch Configuration. IAM Role, Monitoring are optional
5. In Add Storage, review your storage and add/modify if required
6. Select an Security Group and click on Review

7. Click on Create Launch Configuration and then select an Existing Key pair or Create a New Key Pair

Create Auto Scaling Group
1. Go to EC2 Console and Click on Auto Scaling Group
2. In this step, you could choose either Launch Configuration or Launch template to create your Auto Scaling group. Here, we would select Launch Configuration and would select the Launch Configuration that we created in our previous step

3. In this step, We would provide a name to our Auto Scaling group
- Group Size : You could adjust the Ec2 size as per your need. minimum is One
- Network : Select your VPC. Here we would proceed with default
- Subnet : Select a Subnet within your VPC
In Advance details, you could opt for the option Load Balancing to receive traffic to your resources from load balancer. We would discuss about how Auto Scaling works with ELB in our next blog. For now, Lets proceed without the ELB options

4. In Configure Scaling policy, you could opt for either scaling the group with initial size or select scaling policy to adjust the capacity of your group
We would proceed with Scaling policy to adjust the group capacity. Here it would ask the min & max size of your scaling group
Now Click on Scale the Auto Scaling group using step or simple scaling policies to adjust Scale In[Increase Group Size] and Scale Out[Decrease Group Size]

- Increase Group Size : Provide Name, When your Policy would Execute & Take the Action. Add a New Alarm for your Execute policy if you have not created yet. This would increase the resources capacity based on the policy setup
- Decrease Group Size : Provide the details as per above. This would decrease the resource capacity as per your policy setup
Now, click on Add New Alarm to create two alarms for both Scale In and Scale Out policy before you adjust your scaling policy


In above policy setup, the Scaling Group would add 1 Instance when the Average CPU would greater than 85% whereas the Scaling group would remove 1 Instance when the Average CPU would less than 10%
You could also Add steps to provide apply conditions to your policy group
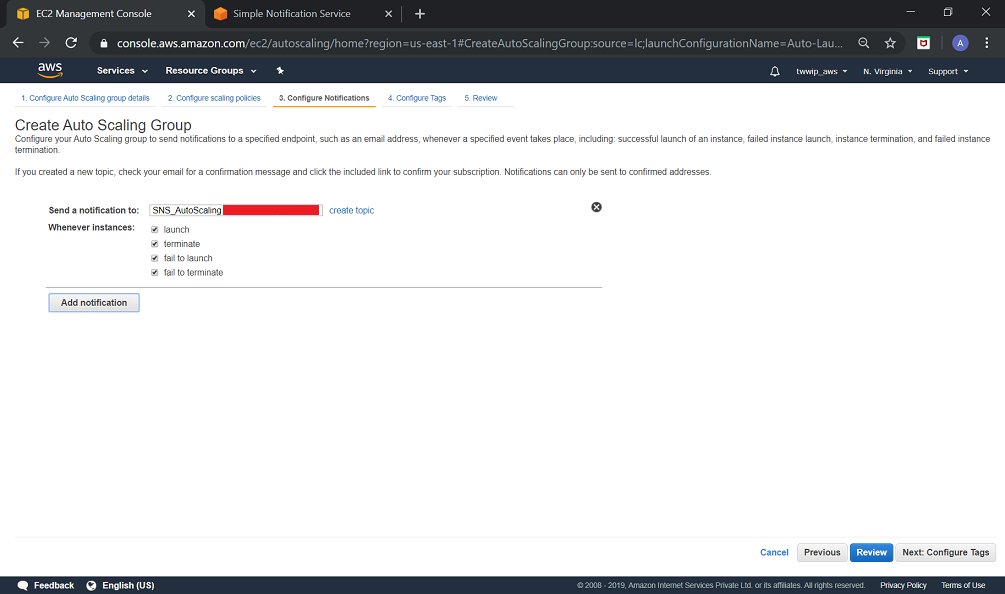
5. In Configuration Notification, you could add Add Notification to notify when your Instances Launches/terminate/fail to launch/fail to terminate
6. Add a Tag to your Scaling Group and next click Create Auto Scaling Group
Once the Auto Scaling Group is created, you would be able to see the group with Desired,Min,Max and other details in console

Few Key properties of Auto Scaling group
- Active History : It display the history of instances launch/terminate/fail to launch information
- Scaling Policies : It shows the Scale In and Scale Out policy details. You could edit either of the policies at anytime with Execute [Ask for new Alarm Metric Value] & Edit option
- Instances : It would show you the Instance details that are launched with this Auto Scaling group
- Monitoring : It shows the metrics details for your Auto Scale group
- Notification : It would show the SNS configuration details
- Tags : Tagging info for your EC2 Instance
- Schedule Action : This is very useful when you want to schedule your Auto Scaling group based on Cron, Once, Every Week, Every 5 Mins etc
- Lifecycle Hook : This is helpful to perform certain actions when your instance launches or terminates
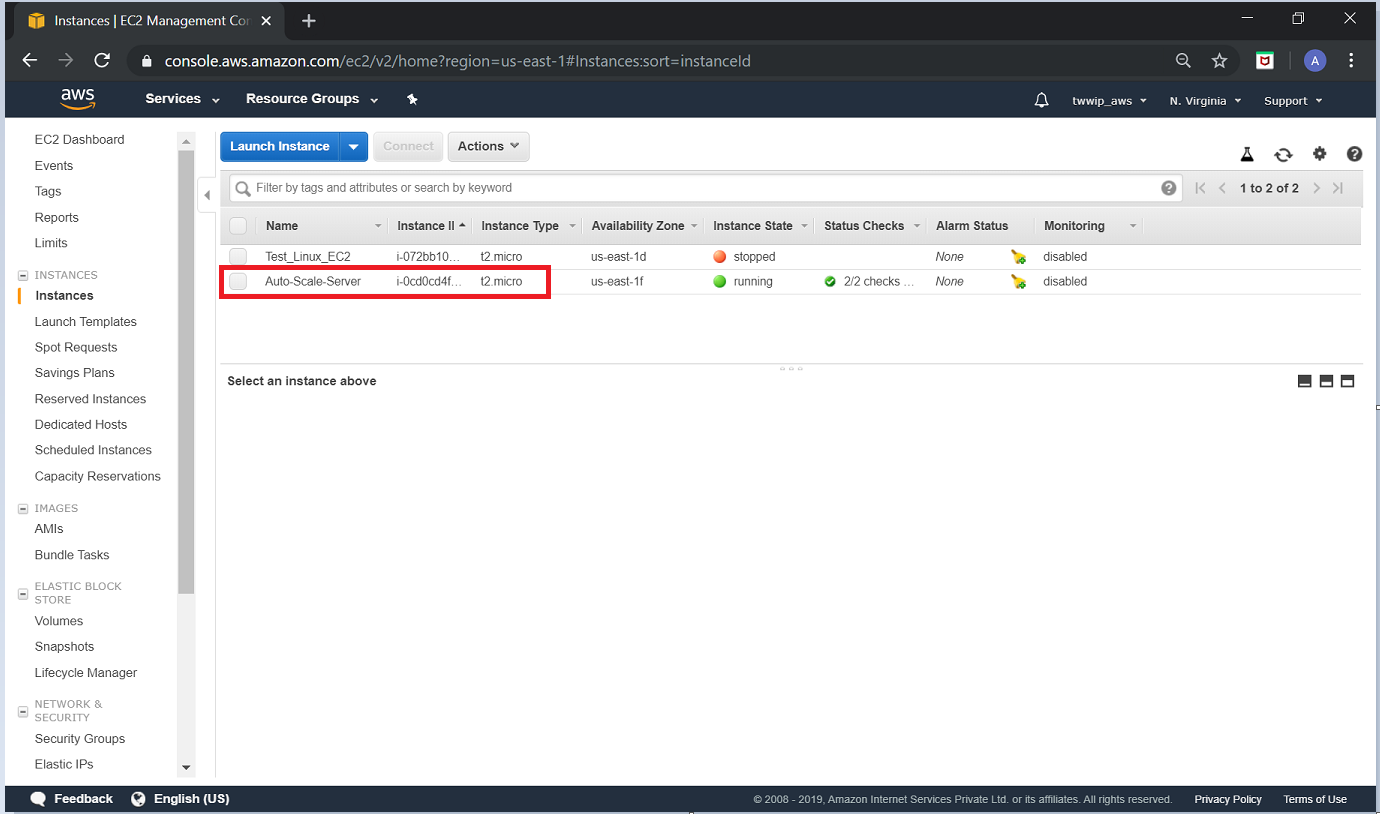
In few minutes of your Auto Scaling group is created, you would be able to see one EC2 spin up in EC2 dash board.
Test the Auto Scaling policy
As we understood, the Auto Scaling group would maintain the resources based on the desire capacity of min and max scaling policy is configured
1. Login using root to Auto Scale EC2 using the Key Pair used in Launch Configuration
2. Create a Bash Script spikecpu.sh with below line of code and Save it
dd if=/dev/zero of=/dev/null
3. Provide Execute Permission to root
chmod 755 spikecpu.sh
4. Now Run the Script multiple times until your CPU reaches near 100 percent
sh spikecpu.sh
5. Check the CPU using top command or check in EC2 CPU Cloudwatch Metrics after 5 minutes

Once the Average CPU crosses above 85%, an another Ec2 would spin up to meet the Ec2 desired capacity [Max – 2].

Now kill all the process that causing this CPU spikes using kill – 9 <PID>. This would reduces the CPU below 10% and suddenly you would see Auto Scaling policy would remove 1 instance to maintain the desire capacity. [Desire : 1, Min : 1, Max : 2]


Now, Auto Scaling group would run with one Instance and would monitor it and would take action based on scaling policy is defined.
I hope this blog helps to understand how to set up Launch Configuration and Auto Scaling group in AWS. Please comment below if you have any concerns/questions related to this blog.